
스프링부트 x 리액트 연동
로그인 기능 구현
1. 로그인 기능의 백엔드(백엔드: 스프링부트) 먼저 구현한다.
UserController 구현
@RestController
@RequestMapping("/user")
public class UserController {

    @Autowired
    private AuthenticationManager authenticationManager;

    @Autowired
    private JwtTokenUtil jwtTokenUtil;

    @Autowired
    UserServiceImpl userService;

    @PostMapping(value = "/login")
public ResponseEntity<?> createAuthenticationToken(@RequestBody UserLoginReq userLoginReq) throws Exception {

        Authentication authentication = authenticate(userLoginReq.getEmail(), userLoginReq.getPassword());
        UserLoginRes userLoginRes = (UserLoginRes) authentication.getPrincipal();

        final String token = jwtTokenUtil.generateToken(userLoginRes);
return ResponseEntity.ok(new JwtResponse(token));
}
private Authentication authenticate(String username, String password) throws Exception {
try {
return authenticationManager.authenticate(new UsernamePasswordAuthenticationToken(username, password));
} catch (DisabledException e) {
throw new Exception("USER_DISABLED", e);
} catch (BadCredentialsException e) {
throw new Exception("INVALID_CREDENTIALS", e);
}
}
}
2. 프론트 부분인 리액트에 새 프로젝트를 생성하고
우선 axios를 추가한다. 터미널에 다음을 입력.
yarn add axios
3. 로그인 관련 함수
아래 3가지 함수를 생성.
(1) executeJwtAuthenticationService 함수
: 로그인 요청 보내기
(2) setupAxiosInterceptors 함수
: 로그인 성공 후, interceptors(보내는 요청을 잡아서 Authorization 헤더에 토큰을 추가하고,다시 보내는..) 등록. 아래 registerSuccessfulLoginForJwt 함수에서 호출함.
(3) registerSuccessfulLoginForJwt 함수
위에서 토큰을 정상 발급 받았으면, 쿠키에 토큰과 사용자 이메일 저장.
const executeJwtAuthenticationService = (email, password) => {
return axios.post("http://localhost:8080/user/login", {
    email,
    password,
});
};
const setupAxiosInterceptors = () => {
  axios.interceptors.request.use(
(config) => {
const token = localStorage.getItem("token");
if (token) {
        config.headers["Authorization"] = "Bearer " + token;
}
return config;
},
(error) => {
      Promise.reject(error);
}
);
};
const registerSuccessfulLoginForJwt = (email, token) => {
  console.log("===registerSuccessfulLoginForJwt===");
  localStorage.setItem("token", token);
  localStorage.setItem("authenticatedUser", email);
setupAxiosInterceptors();
};
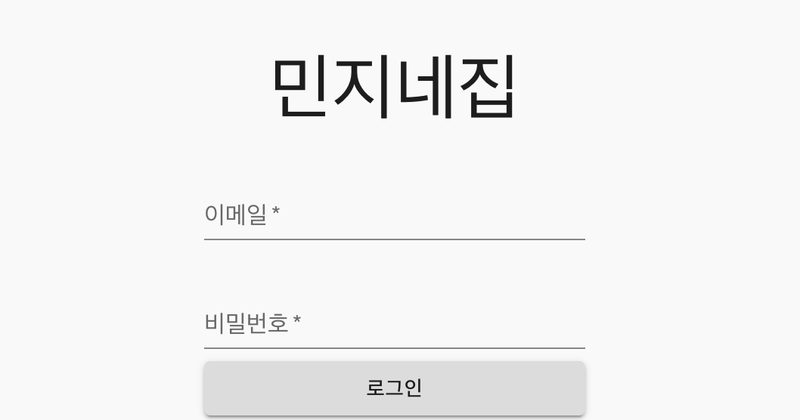
 <Box component="form" onSubmit={handleSubmit} noValidate sx={{ mt: 1 }}>
<TextField
            margin="normal"
            required
            fullWidth
            id="email"
            label="이메일"
            name="email"
            autoComplete="email"
            autoFocus
          />
<TextField
            margin="normal"
            required
            fullWidth
            name="password"
            label="비밀번호"
            type="password"
            id="password"
            autoComplete="current-password"
/>
<Button
            type="submit"
            fullWidth
            variant="contained"
            sx={{ mt: 3, mb: 2 }}
>
{" "}
            로그인{" "}
</Button>
<Grid container>
<Grid item xs>
<Link href="#" variant="body2">
                비밀번호 재설정
              </Link>
<Link href="/user/signup" variant="body2">
                회원가입
              </Link>
</Grid>
</Grid>
</Box>
5. 로그인 버튼을 누르면 입력한 email, password가 handleSubmit 되게.
 const handleSubmit = (event) => {
    event.preventDefault();
const data = new FormData(event.currentTarget);
const email = data.get("email");
const password = data.get("password");
executeJwtAuthenticationService(email, password).then((response) => {
      console.log(response);
registerSuccessfulLoginForJwt(email, response.data.token);
      history.push(`/`);
});
};
event.preventDefault();
링크 이동, 새로고침 방지. 이걸 안해주면 로그인 버튼을 눌렀을 때 링크가 이동되어서, 함수 동작이 되다가.. 동작이 끊어진다.
const data = new FormData(event.currentTarget);
const email = data.get("email");
const password = data.get("password");
data에 저장되어 있는 것들 중에서 입력한 email과 password를 가지고 옴.
executeJwtAuthenticationService
로그인 요청하는 함수 호출,
.then((response) => {
console.log(response);
registerSuccessfulLoginForJwt(email, response.data.token);
history.push(`/`);
그리고 백엔드로부터 요청에 대한 응답이 오면,
콘솔 로그에 response 값 찍어주고
registerSuccessfulLoginForJwt 함수(토큰을 정상 발급 받았으면, 쿠키에 토큰과 사용자 이메일 저장 ) 호출,
'/' url로 페이지 이동.