1. 라즈베리파이 = publisher
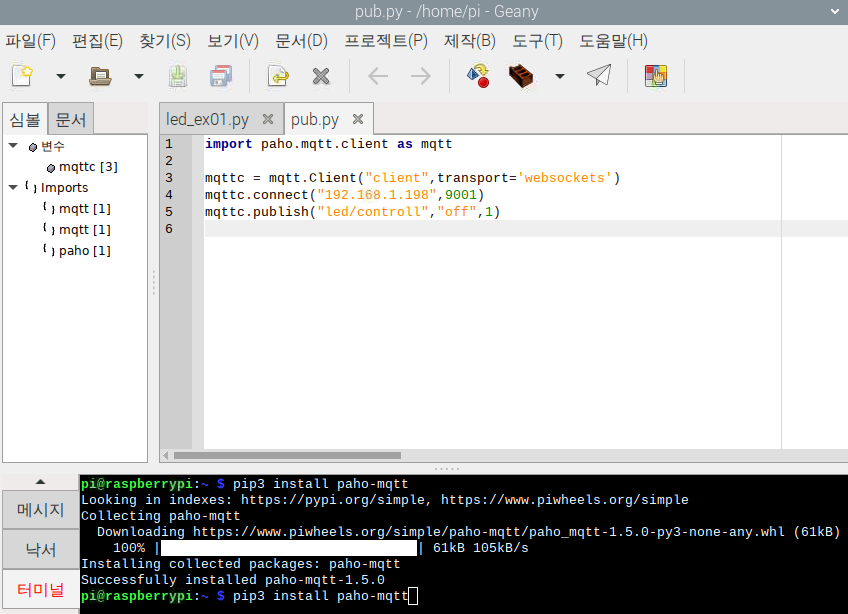
1) 코드
import paho.mqtt.client as mqtt

mqttc = mqtt.Client("client",transport='websockets')
mqttc.connect("[브로커 IP]", 9001)
mqttc.publish("[토픽]", "[메시지]", 1)
브로커ip : 내 본체 컴퓨터 ip !
가상머신 우분투에서 9001번으로 포트포워딩을 해둔 다음 해야합니다.
2. 웹= subscriber
1) 이번엔 웹이 subscriber 가 되는 거니까,
장고에서 우선
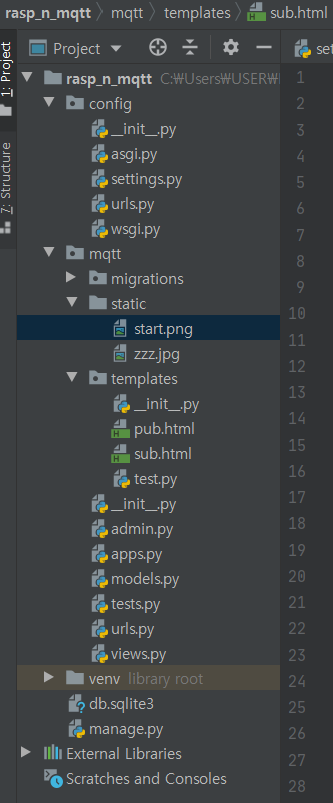
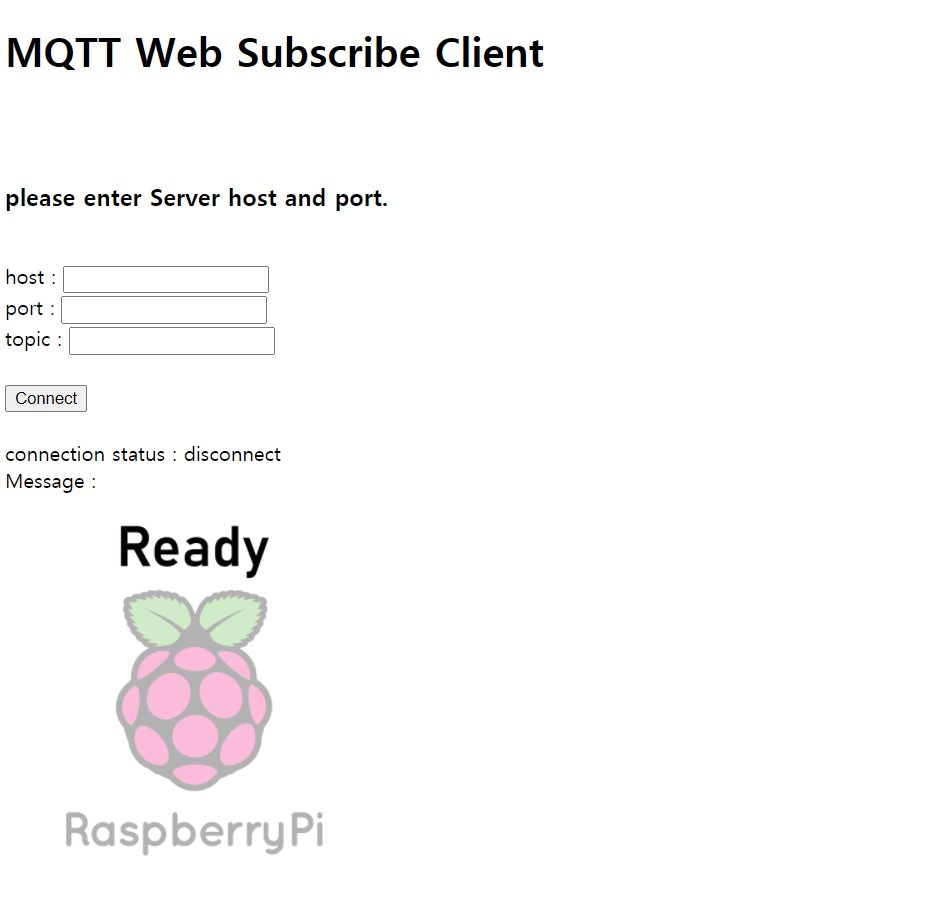
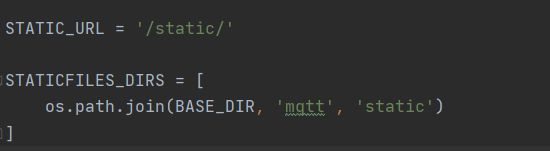
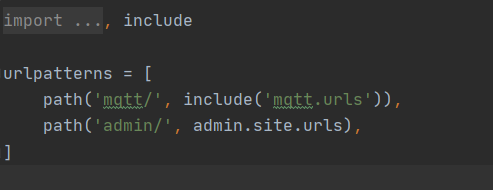
왼쪽 참고 그림과 같이 세팅해서
오른쪽 페이지를 띄워줍니다.
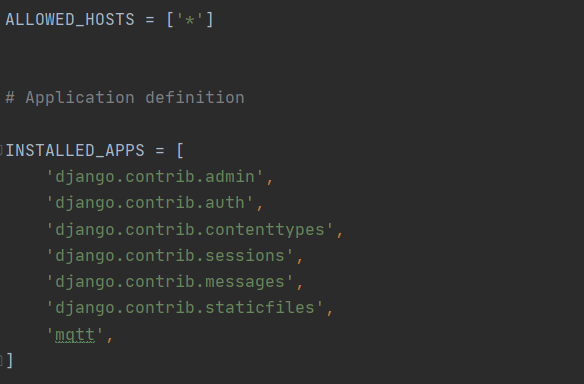
# settings
# urls.py
# startapp : mqtt
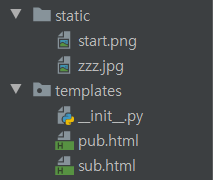
static 폴더에 이미지 넣고,
templates 에서 sub 이라는 이름의 html 파일 만들기
1) sub.html 코드
<!DOCTYPE html>
<html>
<head>
<meta http-equiv="Content-Type" content="text/html; charset=UTF-8">
<script src="https://cdnjs.cloudflare.com/ajax/libs/paho-mqtt/1.0.1/mqttws31.js" type="text/javascript"></script>
<title>MQTT Web Client</title>
</head>
<body>
<H1>MQTT Web Subscribe Client</H1><br><br>
<h3>please enter Server host and port.</h3><br>
<label for="text_host">host</label> : <input type="text" id="text_host" /><br>
<label for="text_port">port</label> : <input type="text" id="text_port" /><br>
<label for="text_topic">topic</label> : <input type="text" id="text_topic" /><br><br>
<input type="button" id="mqtt_con_but" value="Connect" onclick="beginMQTTweb()">
<br><br>

connection status : <div id="con_status" style="display:inline">disconnect</div><br>
Message : <div id="msg" style="display:inline"></div><br>
<script type="text/javascript" src="<c:url value="/js/mqttws31.js"/>"></script>
<script type="text/javascript">
function beginMQTTweb() {
if (document.getElementById("mqtt_con_but").value == "Connect") {
			host = document.getElementById("text_host").value;
			port = document.getElementById("text_port").value;
			topic = document.getElementById("text_topic").value;
if ((host == "") || (port == "")) {
alert("Please enter host and port.");
} else {
				mqclient = new Paho.MQTT.Client(host, Number(port), "clientId_pcm");
// set callback handlers
				mqclient.onConnectionLost = onConnectionLost;
				mqclient.onMessageArrived = onMessageArrived;
// connect the client
				mqclient.connect({
onSuccess : onConnect,
onFailure : onFailure
				});
}
} else if (document.getElementById("mqtt_con_but").value == "Disconnect") {

			mqclient.disconnect();
			document.getElementById("con_status").textContent = "disconnect";
			document.getElementById("mqtt_con_but").value = "Connect";
			console.log("Disconnect");
}
}
function onFailure() {
alert("Please enter host and port again.")
}
// called when the client connects
function onConnect() {
// Once a connection has been made, make a subscription and send a message.
		console.log("onConnect");
		document.getElementById("con_status").textContent = "connect";
		mqclient.subscribe(topic);
		document.getElementById("mqtt_con_but").value = "Disconnect";
}
// called when the client loses its connection
function onConnectionLost(responseObject) {
if (responseObject.errorCode !== 0) {
			console.log("onConnectionLost:" + responseObject.errorMessage);
			document.getElementById("con_status").textContent = "disconnect";
			document.getElementById("mqtt_con_but").value = "Connect";
}
}
// called when a message arrives
function onMessageArrived(message) {
		console.log("onMessageArrived:" + message.payloadString);
		document.getElementById("msg").textContent = message.payloadString;
if(message.payloadString=="on") {
                         on 이라고 보냈을 때 뜨는 이미지
		    document.getElementById("img").src = "/static/red-led-on-md.png";
} else {
                         다른 메시지 보냈을 때 뜨는 이미지
		    document.getElementById("img").src = "/static/red-led-off-md.png";
}
}
</script>
<img id="img" src="/static/red-led-off-md.png">
</body>
</html>
2) Django URL 추가
urlpatterns = [
path('sub', views.sub, name='sub'),
path('pub', views.pub, name='pub'),
path('publish', views.publish, name='publish'),
]
3) views.py
from django.shortcuts import render, redirect

import paho.mqtt.client as mqtt


def pub(request):
return render(request, 'pub.html')

def sub(request):
return render(request, 'sub.html')


def publish(request):
if request.method == "POST":
        topic = request.POST['topic']  # 토픽 전달받음
        message = request.POST['message']  # 메시지 전달받음

        mqttc = mqtt.Client("client", transport='websockets')
        mqttc.connect("192.168.1.198", 9001)
        mqttc.publish(topic, message, 1)  # QoS 1로 publishing

        return redirect('/mqtt/pub')  # 다시 pub.html 페이지 보여줌
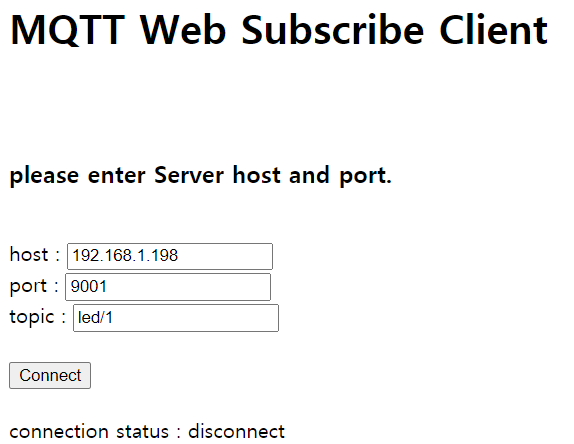
[ Connection 상태 : disconnect ] 에서
connect 버튼을 누르면?
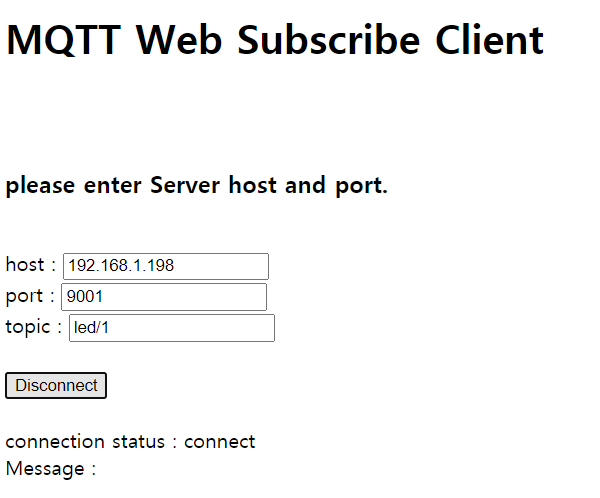
Connection 상태가 바뀐 것 확인!
3. 가상머신 우분투안에서 mosquitto 켜줌

4. 라즈베리파이 코드
# -*- coding: utf-8 -*-
import paho.mqtt.client as mqtt
import RPi.GPIO as GPIO
import time
button_pin = 15
led_pin=4
GPIO.setwarnings(False)
GPIO.setmode(GPIO.BCM)
GPIO.setup(button_pin,GPIO.IN, pull_up_down=GPIO.PUD_DOWN)
GPIO.setup(led_pin, GPIO.OUT)

light_on=False

def button_callback(channel):
	topic = "led/1"
	message = "on"

	global light_on
	if light_on == False:
GPIO.output(led_pin,1)

		mqttc = mqtt.Client("client", transport='websockets')
		mqttc.connect("192.168.1.198", 9001)
		mqttc.publish(topic, message, 1)
else:
GPIO.output(led_pin,0)
print("OFF")
		mqttc = mqtt.Client("client", transport='websockets')
		mqttc.connect("192.168.1.198", 9001)
		mqttc.publish(topic, "Off", 1)

	light_on=not light_on

GPIO.add_event_detect(button_pin,GPIO.RISING, callback=button_callback)
while 1:
	time.sleep(0.1)
# -*- coding: utf-8 -*-
import paho.mqtt.client as mqtt
import RPi.GPIO as GPIO
import time
button_pin = 15
led_pin=4
GPIO.setwarnings(False)
GPIO.setmode(GPIO.BCM)
GPIO.setup(button_pin,GPIO.IN, pull_up_down=GPIO.PUD_DOWN)
GPIO.setup(led_pin, GPIO.OUT)

light_on=False

def button_callback(channel):
	topic = "led/1"
	message = "on"

	global light_on
	if light_on == False:
GPIO.output(led_pin,1)

		mqttc = mqtt.Client("client", transport='websockets')
		mqttc.connect("192.168.1.198", 9001)
		mqttc.publish(topic, message, 1)
else:
GPIO.output(led_pin,0)
print("OFF")
		mqttc = mqtt.Client("client", transport='websockets')
		mqttc.connect("192.168.1.198", 9001)
		mqttc.publish(topic, "Off", 1)

	light_on=not light_on

GPIO.add_event_detect(button_pin,GPIO.RISING, callback=button_callback)
while 1:
	time.sleep(0.1)